UISegmentedControl example introduction
In the previous tutorial we have learned about working with UISwitch, in this “UISegmentedControl Example” tutorial going to explain about creating UISegmentedControl. The iOS segmented control is a UI component that is used to display, in a compact UI with serious of segment options for the user to choose from, each segment work like a button you can use text or image in the segment but not both, if you are an HTML developer you can easily related iOS segmented control to HTML radio button group.
This UISegmentedControl Example is written in swift so must need Xcode 6 or higher version to run this application.
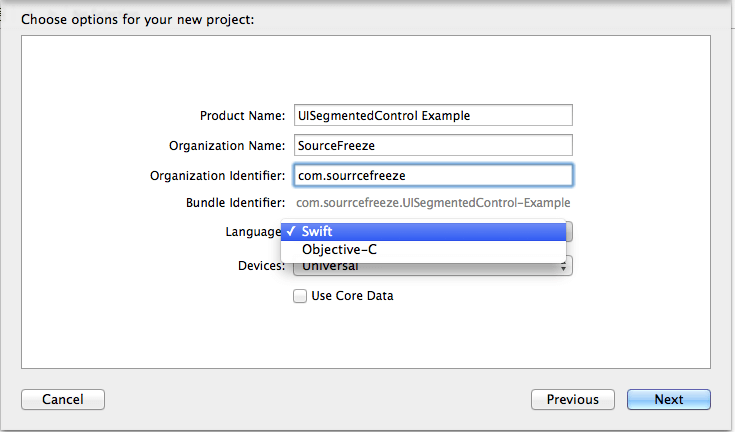
Open Xcode and create a new single view application, enter the product name as “UISegmentedControl Example”, fill out the Organization and Organization Identifier details, and select the “Swift” in the language field and remains the Use Core Data field as unselected because we are not using that feature, then select next and save the project.
to create an iOS segmented control either we can use a storyboard or code instance let’s start our tutorial using storyboard.
Adding UISegmentedControl into a storyboard
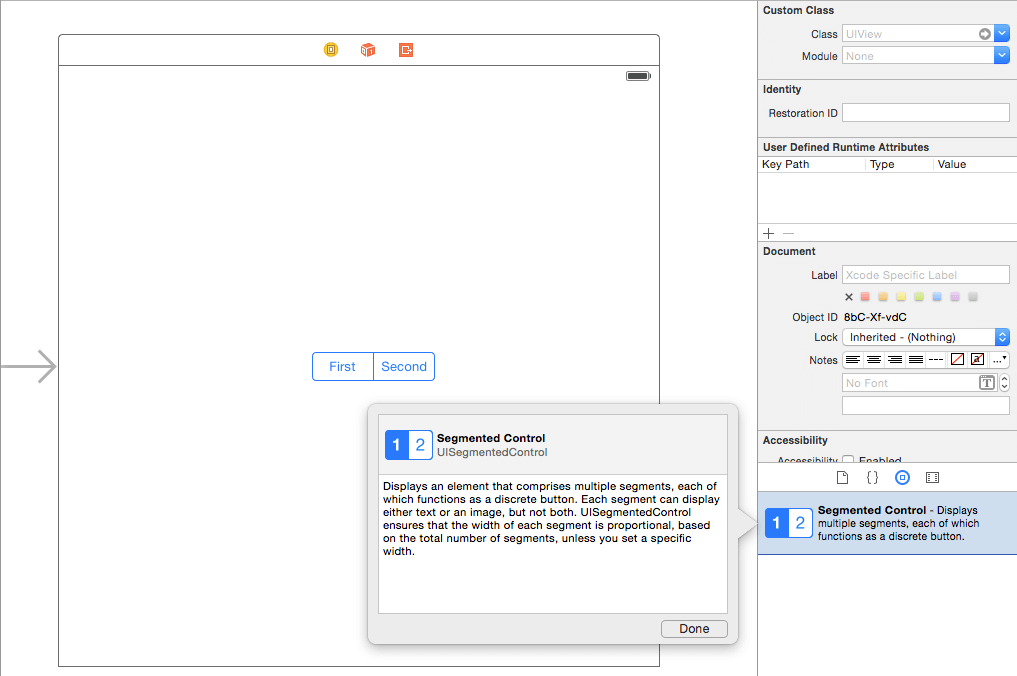
Open the Main.storyboard file, then drag the UISegmentedControl into the main view it looks like the below,
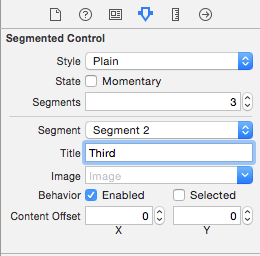
then, select the segmented control, and Press the command+option+4 to open the Attributes inspector, change the “Segments” option to 3, next select the Segment drop-down menu choose “Segment 2”, and enter the Title as “Third” as shown in the below.
 then center align the uisegmented control using align tab listed in the bottom of the storyboard view, click the check box of Horizontal center in container and Vertical center in container Next select the “Add 2 constraints” as shown in the below, Now segmented control added into the center of the view.

Now, drag the UILabel into the main view, Select the label and in the Attributes Inspector set text Text Alignment to center, next click the align tab select only Horizontal center in container and click the Add 2 Constraints.
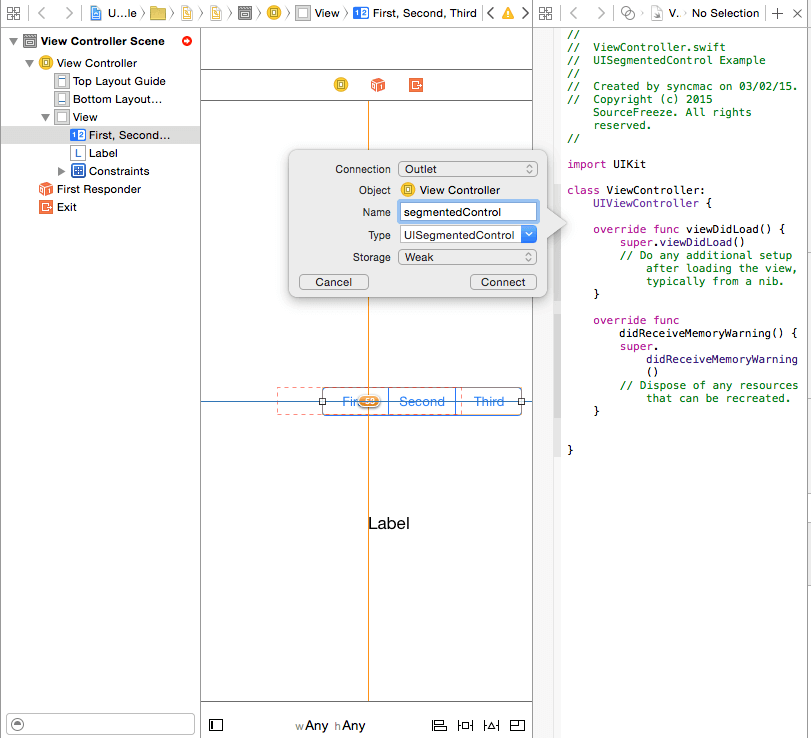
Next, we have to add IBOutlet and IBActions for the UISegmentedControl. Create an IBOutlet for UISegmentedControl and name it as “segmentedControl”
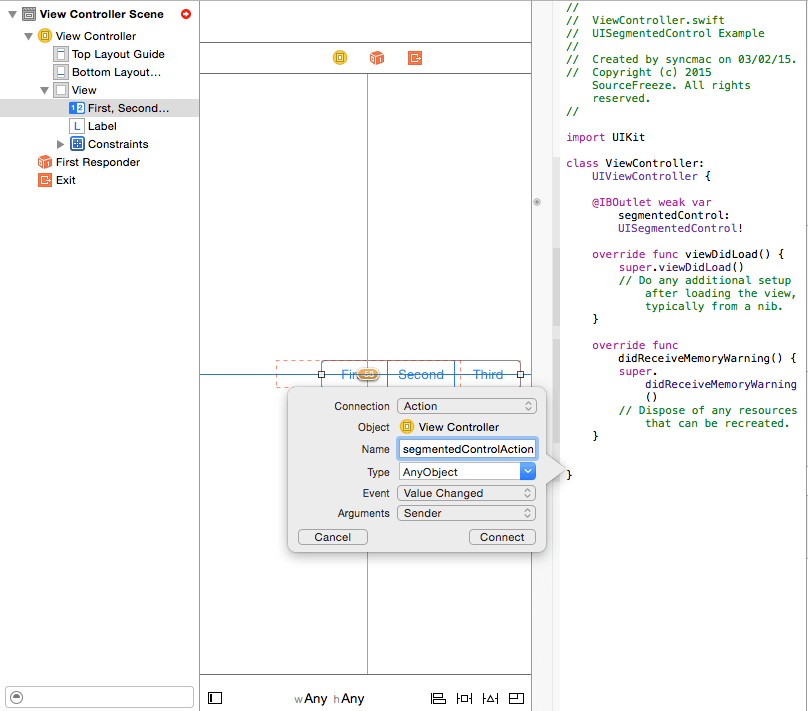
Then, create the IBAction for Segmented Control and Name it as “segmentedControlAction”
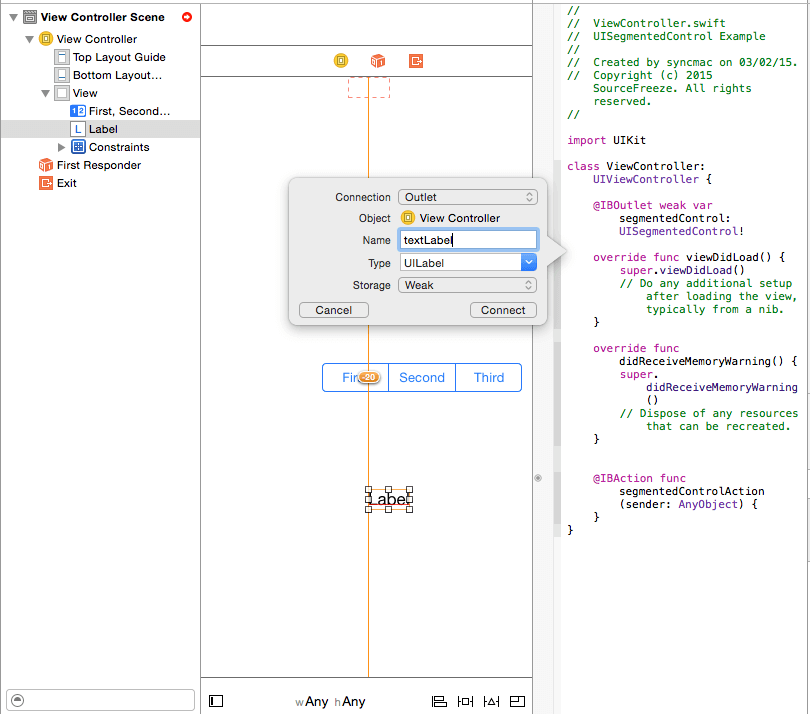
Now, Create the IBOutlet for added label and name it as “textLabel” as shown in the below.
UISegmentedControl Coding Part
Then add the below code snippet into viewDidLoad method, like below for changing the textLabel value as “First Segment Selected” because by default the first segment is selected.
override func viewDidLoad()
{
super.viewDidLoad()
// Do any additional setup after loading the view, typically from a nib.
textLabel.text = "First Segment Selected";
}
Now we are going to change the textLabel values, while clicking the UISegementedControl Segments, just add the below code into the “segmentedControlAction” method in the ViewController.swift file.
@IBAction func segmentedControlAction(sender: AnyObject)
{
if(segmentedControl.selectedSegmentIndex == 0)
{
textLabel.text = "First Segment Selected";
}
else if(segmentedControl.selectedSegmentIndex == 1)
{
textLabel.text = "Second Segment Selected";
}
else if(segmentedControl.selectedSegmentIndex == 2)
{
textLabel.text = "Third Segment Selected"; }
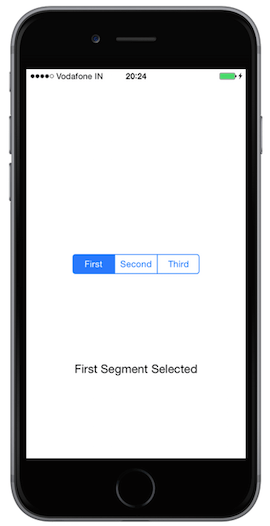
}Then go ahead Build and Run the application will get the below output in the selected iphone or ios simulator.
Create UISegmentedControl Programmatically
Instead of using the storyboard can implement uisegmentedcontrol programatically by adding the below code into viewDidLoad method in ViewController.swift file. first create the object for uisegmentedcontrol and add the frame where have to place segmented control. next add selectedSegmentIndex we have added index as 0, and create the action for segmentedControl finally add the Segmented control into the view.
var segmentedControl:UISegmentedControl!
override func viewDidLoad()
{
super.viewDidLoad()
// Do any additional setup after loading the view, typically from a nib.
segmentedControl = UISegmentedControl (items: ["First","Second","Third"])
segmentedControl.frame = CGRectMake(60, 250,200, 30)
segmentedControl.selectedSegmentIndex = 0
segmentedControl.addTarget(self, action: "segmentedControlAction:", forControlEvents: .ValueChanged)
self.view.addSubview(segmentedControl)
}
I hope this project is cool!! you can download the Source Code here.
Leave a Reply