Source Freeze

  • Home
  • iOS
  • Swift
  • Cross-Platform
  • About
  • Contact
Home » beginner

How to Generate random numbers in JavaScript

December 20, 2023 by Source Freeze Leave a Comment

In JavaScript, generating random numbers is a common requirement for various tasks, ranging from game development to statistical simulations. The ability to create random numbers is crucial, and JavaScript provides us with methods to accomplish this efficiently. In this blog, we’ll learn how to generate random numbers in JavaScript
How to Generate random numbers in javascript

Math.random()

The Math.random() function in JavaScript is foundational for generating pseudo-random floating-point numbers. It returns a floating-point number between 0 (inclusive) and 1 (exclusive), where 0 is inclusive and 1 is exclusive.

Consider this basic example:

const randomNumber = Math.random();
console.log(randomNumber);

Here, Math.random() provides us with a random decimal number. It’s crucial to understand that this method doesn’t accept any arguments; it solely generates a random decimal between 0 (inclusive) and 1 (exclusive) every time it’s called.

Using Math.random() to Generate Specific Ranges

Now, if we want to create random numbers within a particular range, such as between 10 and 50, we need to manipulate the output of Math.random() using simple arithmetic.

For instance:

function getRandomInRange(min, max) {
  return Math.random() * (max - min) + min;
}

const randomInRange = getRandomInRange(10, 50);
console.log(randomInRange);

In this example, getRandomInRange() accepts a min and max value and generates a random number within that range.

Here’s some of the outputs we’ll get in the range on 10 & 50:

23.236899532520656
32.790891513808575

When generating random numbers in JavaScript, one common issue is the output of numbers with numerous decimal places, making the result less manageable or suitable for specific applications. For instance, using Math.random() to create a range might produce lengthy decimal values.

Consider this code:

function getRandomInRange(min, max) {
  return (Math.random() * (max - min) + min).toFixed(2);
}

const randomInRange = getRandomInRange(10, 50);
console.log(randomInRange);

Here, we utilize the toFixed() method to limit the output to two decimal places. This action addresses the problem of excessive decimals, ensuring that the generated random number will always have precisely two decimal points.

Here’s the output:

35.88
44.97

Conclusion

In this blog, we explored JavaScript’s capabilities in generating random numbers. We learned the foundational method, Math.random(), which allows us to produce unpredictability in our applications.

Alongside we also learnt about the toFixed() method to round up the unnecessary decimal places.

Also read:

  • Capitalize First letter in JavaScript
  • Remove all Classes from an Element in JavaScript
  • Append Text to a Textarea in JavaScript
  • How to create a style tag using JavaScript
  • Remove all Classes from an Element in JavaScript
  • Hide/Show an Element in JavaScript

Filed Under: javascript Tagged With: beginner, javascript, web developer

How to Scroll to an Element in a React Component?

December 20, 2023 by Source Freeze Leave a Comment

Scrolling to specific elements within a React component is a common requirement in web development. Whether it’s navigating to a particular section of a webpage or focusing on an element after an action, understanding the methods to achieve this within a React context is essential. In this guide, we’ll learn how to Scroll to an Element in a React Component?

How to Scroll to an Element in a React Component?

Using scrollIntoView()

The scrollIntoView() method is a native browser API that smoothly scrolls the specified element into the viewport. In React, we can access this method using the ref attribute to reference the DOM element.

Let’s assume we have a React component with a target element we want to scroll to:

import React, { useRef } from 'react';

const ScrollComponent = () => {
  const elementRef = useRef(null);

  const scrollToElement = () => {
    if (elementRef.current) {
      elementRef.current.scrollIntoView({ behavior: 'smooth' });
    }
  };

  return (
    <div>
      <button onClick={scrollToElement}>Scroll to Element</button>
      <div ref={elementRef}>Target Element to Scroll To</div>
      {/* Other content */}
    </div>
  );
};

export default ScrollComponent;

We use the useRef() hook to create a reference to the target element (elementRef).Upon clicking the button, the scrollToElement() function is triggered.Inside scrollToElement(), we check if the reference to the element exists (elementRef.current). If it does, we invoke scrollIntoView() on that element with the option { behavior: ‘smooth’ }, ensuring a smooth scrolling effect.

Using scroll(x, y)

The scroll() method is a straightforward way to scroll an element to a particular position, specified by coordinates (x, y). In a React context, we can employ this method by obtaining a reference to the parent container or the window object and then utilizing scroll() to navigate to a specific position.

Consider a scenario where we want to scroll a container to a particular position:

import React, { useRef } from 'react';

const ScrollComponent = () => {
  const containerRef = useRef(null);

  const scrollToPosition = () => {
    if (containerRef.current) {
      const { current: container } = containerRef;
      container.scrollTo({ top: 200, behavior: 'smooth' });
    }
  };

  return (
    <div ref={containerRef} style={{ height: '300px', overflowY: 'scroll' }}>
      <button onClick={scrollToPosition}>Scroll to Position</button>
      <div style={{ height: '600px' }}>Scrolling Container</div>
      {/* Other content */}
    </div>
  );
};

export default ScrollComponent;

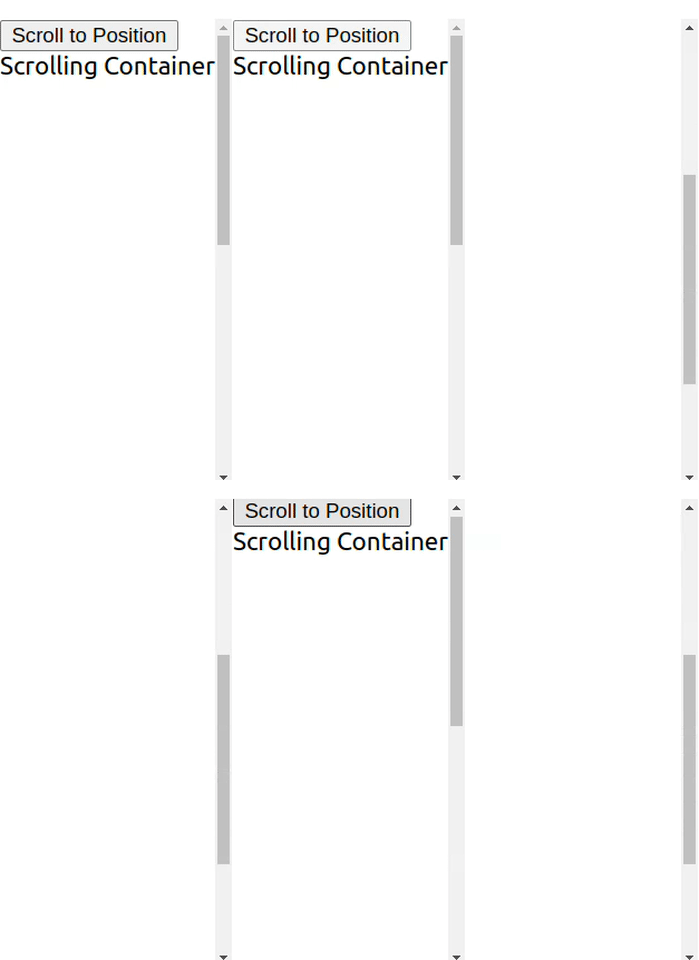
We create a reference to the container element (containerRef) using the useRef() hook.Upon clicking the button, the scrollToPosition() function is triggered.Inside scrollToPosition(), we retrieve the DOM element using the reference (containerRef.current). Then, we use the scrollTo() method with the desired position (top: 200) and a smooth scrolling behavior.

Here’s how it looks like:

Conclusion

In this guide, we explored various techniques to smoothly scroll to elements within React components, enhancing user interaction and navigation on web pages. We learnt two prominent methods:

  1. scrollIntoView() Method:
    • This method smoothly scrolls the specified element into the viewport.
    • Utilizes the ref attribute to reference the DOM element and triggers scrollIntoView() for smooth scrolling behavior.
  2. scroll(x, y) Method:
    • Allows scrolling to specific coordinates within an element or the window.
    • Utilizes the scroll() method with precise positioning coordinates (e.g., top, left) for targeted scrolling.

Also checkout:

  • How to get the current Year in React
  • Capitalize First letter in JavaScript
  • Remove all Classes from an Element in JavaScript
  • Append Text to a Textarea in JavaScript
  • How to create a style tag using JavaScript
  • Remove all Classes from an Element in JavaScript
  • Hide/Show an Element in JavaScript

Filed Under: javascript, react-native Tagged With: beginner, javascript, web developer

How to get a Date without the Time in JavaScript

December 20, 2023 by Source Freeze Leave a Comment

JavaScript, the language of the web, helping us to work with dates effortlessly. When handling dates, sometimes we only need the date without the time component. This could be for displaying events, scheduling, or organizing tasks. Fortunately, JavaScript offers various methods to extract the date without the time, making it simpler for developers to manipulate and display dates accurately. In this guide, we’ll explore several methods to get a Date without the Time in JavaScript.

How to get a Date without the Time in JavaScript

Using the Date Object Methods

The Date object in JavaScript comes with several methods that allow us to manipulate dates. One of these methods is toISOString(), which returns the date in the format of a string representing the date and time. To extract only the date part from this string, we can utilize the split() method along with string manipulation.

// Get the current date
const currentDate = new Date();

// Convert the date to ISO string format
const dateISOString = currentDate.toISOString();

// Extract only the date part
const dateWithoutTime = dateISOString.split('T')[0];

console.log('Date without time:', dateWithoutTime);

This code creates a Date object named currentDate, representing the current date and time when this code executes. This object holds both the date and time components.

The toISOString() method converts the currentDate object to a string representation in the ISO 8601 format (YYYY-MM-DDTHH:mm:ss.sssZ). This format includes the date, time, and timezone information, separated by the ‘T’ character.

Here, split(‘T’)[0] is used to separate the date and time components in the ISO string. It splits the string at the ‘T’ character, resulting in an array with two parts. The [0] index retrieves the first part, which contains only the date information. The final variable dateWithoutTime stores the extracted date without the time component.

Output:

Date without time: 2023-12-19

Using setHours() Method

The setHours() method allows us to manipulate the hour component of a date object. By setting the hours, minutes, seconds, and milliseconds to zero, we effectively eliminate the time portion, retaining only the date.

Let’s explore this method through a code example:

// Function to extract date without time using setHours() with padding
function getDateWithoutTime(date) {
    // Create a new date object to avoid modifying the original date
    const dateWithoutTime = new Date(date);

    // Set hours, minutes, seconds, and milliseconds to zero
    dateWithoutTime.setHours(0, 0, 0, 0);

    // Format date components with padding
    const year = dateWithoutTime.getFullYear();
    const month = String(dateWithoutTime.getMonth() + 1).padStart(2, '0');
    const day = String(dateWithoutTime.getDate()).padStart(2, '0');

    return `${year}-${month}-${day}`;
}

// Get the current date
const currentDate = new Date();

// Obtain the date without time and format it with padding
const dateNoTime = getDateWithoutTime(currentDate);

console.log('Date without time:', dateNoTime);

In this code snippet, the getDateWithoutTime() function serves the purpose of isolating the date component without any time-related information. To achieve this, the setHours(0, 0, 0, 0) method is used, resetting the hours, minutes, seconds, and milliseconds to zero within a new Date object created from the provided date.

Furthermore, to ensure uniformity and a standardized format when displaying the date, the function proceeds to format the year, month, and day components. The getFullYear(), getMonth(), and getDate() methods retrieve these components, while padStart() ensures that single-digit months and days are padded with a leading zero, resulting in a consistent format like ‘YYYY-MM-DD’.

Output:

Date without time: 2023-12-19

Using the setSeconds() Method:

The getSeconds() method within the JavaScript Date object retrieves the seconds component from a given date. Though getSeconds() doesn’t directly help in extracting a date without the time, we can still employ it alongside other methods to ensure consistent formatting when displaying a date without the time component.

Here’s an example demonstrating the usage of getSeconds() in conjunction with other methods to format the date without time:

// Function to extract date without time using getSeconds() with padding
function getDateWithoutTime(date) {
    // Create a new date object to avoid modifying the original date
    const dateWithoutTime = new Date(date);

    // Set seconds and milliseconds to zero
    dateWithoutTime.setSeconds(0, 0);

    // Format date components with padding
    const year = dateWithoutTime.getFullYear();
    const month = String(dateWithoutTime.getMonth() + 1).padStart(2, '0');
    const day = String(dateWithoutTime.getDate()).padStart(2, '0');

    return `${year}-${month}-${day}`;
}

// Get the current date
const currentDate = new Date();

// Obtain the date without time and format it with padding
const dateNoTime = getDateWithoutTime(currentDate);

console.log('Date without time:', dateNoTime);

This code performs similar operations as before, creating a function getDateWithoutTime() to extract a date without the time component. Despite using setSeconds() to reset the seconds and milliseconds to zero, it’s important to note that the seconds value itself isn’t utilized in the final output.

The getSeconds() method is used indirectly, ensuring that the time is nullified by setting the seconds and milliseconds to zero. The subsequent formatting of year, month, and day components with padding, similar to the previous example, guarantees a consistent ‘YYYY-MM-DD’ format when presenting the date without the time component.

Output will still be the same:

Date without time: 2023-12-19

Conclusion

In this comprehensive guide, we’ve explored various methods in JavaScript to extract a date without its accompanying time component. Through practical code examples and explanations, we’ve gained insights into different approaches:

  1. Leveraging toISOString() and String Manipulation: By converting the date to an ISO string format and extracting only the date portion through string manipulation methods like split(), we can isolate the date component.
  2. Using setHours() and setSeconds(): These methods within the Date object allow us to reset specific time components to zero, effectively removing the time element and leaving us solely with the date.

Our other blogs:

  • Capitalize First letter in JavaScript
  • Remove all Classes from an Element in JavaScript
  • Append Text to a Textarea in JavaScript
  • How to create a style tag using JavaScript
  • Remove all Classes from an Element in JavaScript
  • Hide/Show an Element in JavaScript

Filed Under: javascript Tagged With: beginner, javascript, web developer

How to modify url without reloading the page using javascript

December 20, 2023 by Source Freeze Leave a Comment

In this blog, we’ll learn about JavaScript’s capability to modify URLs without the need for page reloads. Have you ever noticed how websites update the URL in your browser without fully refreshing the page? We’ll explore the powerful tools provided by JavaScript—such as the History and Location APIs—that allow us to tweak URLs dynamically. By the end, you’ll have a clear understanding of how to modify url without reloading the page using javascript.

how to modify url without reloading the page using javascript

Using History API:

The History API in JavaScript provides methods to manipulate the browser’s history stack, allowing us to modify the URL without causing a full page refresh. This is particularly useful when creating smooth, dynamic user experiences in web applications.

Let’s consider a scenario where you have a simple HTML page with navigation links that, when clicked, change the URL without reloading the entire page. We’ll create an example where clicking different links will change the URL accordingly.

<!DOCTYPE html>
<html>
<head>
  <title>URL Modification Example</title>
</head>
<body>
  <h2>History API Example</h2>
  <nav>
    <ul>
      <li><a href="#" onclick="changeURL('page1')">Page 1</a></li>
      <li><a href="#" onclick="changeURL('page2')">Page 2</a></li>
      <li><a href="#" onclick="changeURL('page3')">Page 3</a></li>
    </ul>
  </nav>
  <div id="content">
    <!-- Content will be dynamically loaded here -->
  </div>

  <script>
    function changeURL(page) {
      const newURL = `/${page}`;
      history.pushState(null, null, newURL);
      loadContent(page);
    }

    function loadContent(page) {
      // Here, you'd fetch content based on 'page'
      // For demonstration, let's just show the page name
      document.getElementById('content').innerText = `Displaying ${page}`;
    }
  </script>
</body>
</html>

In this example, we have a basic HTML structure containing a heading, navigation links, and a content section. The nav contains links to different pages (Page 1, Page 2, Page 3), each calling the changeURL() function when clicked.

The changeURL() function takes the page name as an argument, constructs a new URL based on that name, and uses history.pushState() to modify the URL without reloading the page. Additionally, it calls the loadContent() function to load content dynamically (this part could involve AJAX requests to fetch actual content).

For demonstration purposes, the loadContent() function simply displays the name of the page in the content section.

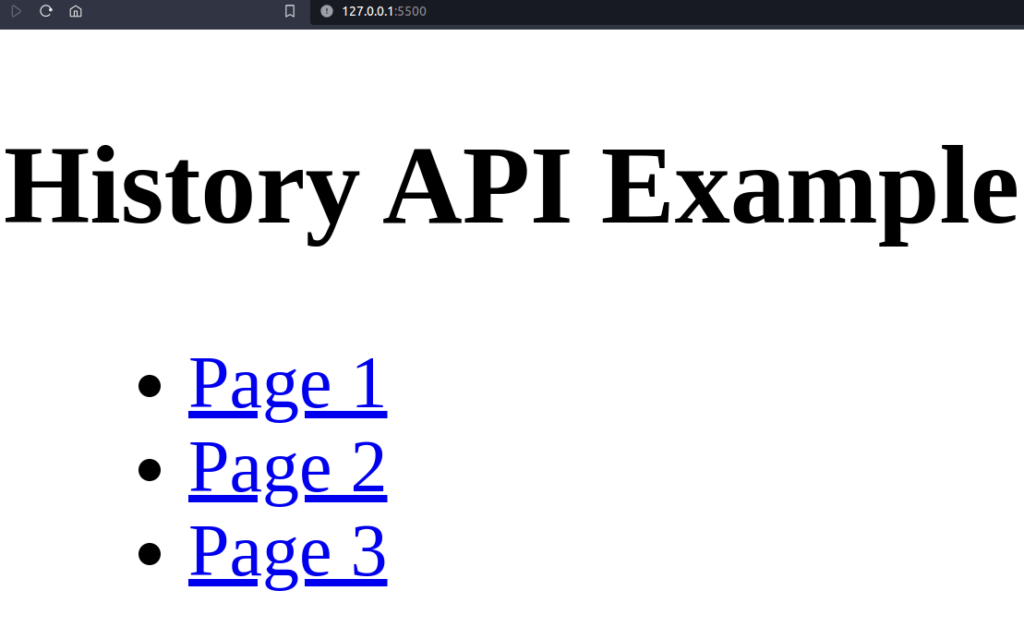
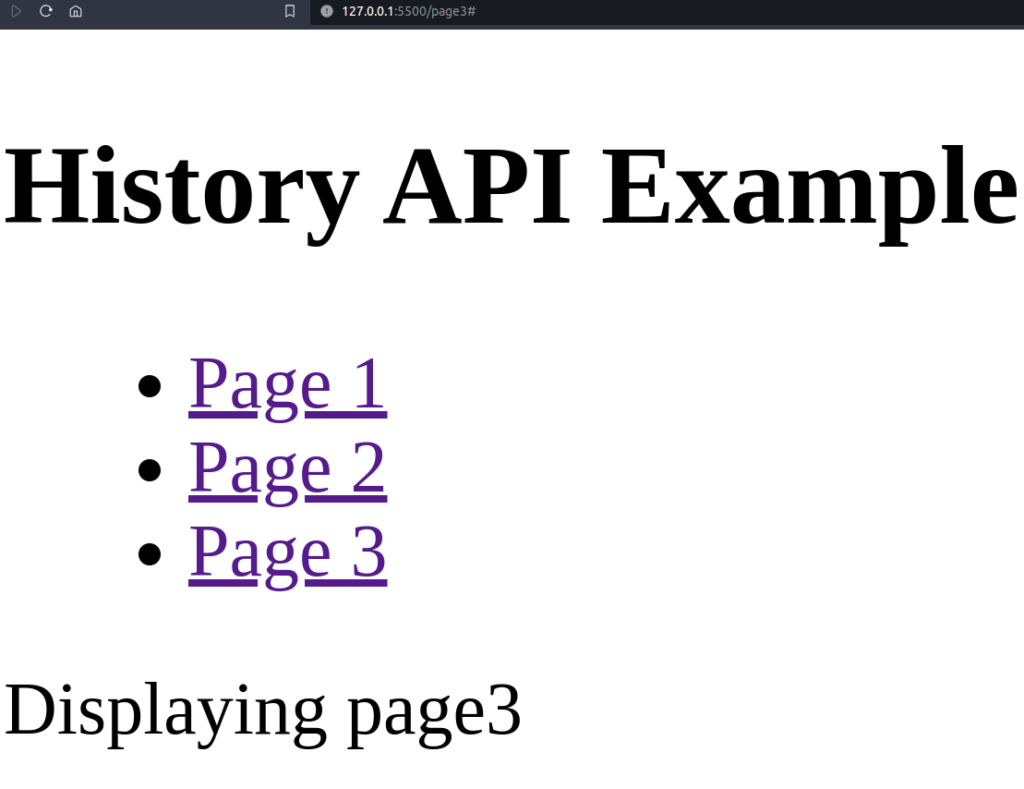
Here’s the page as soon as it loads:

loaded page

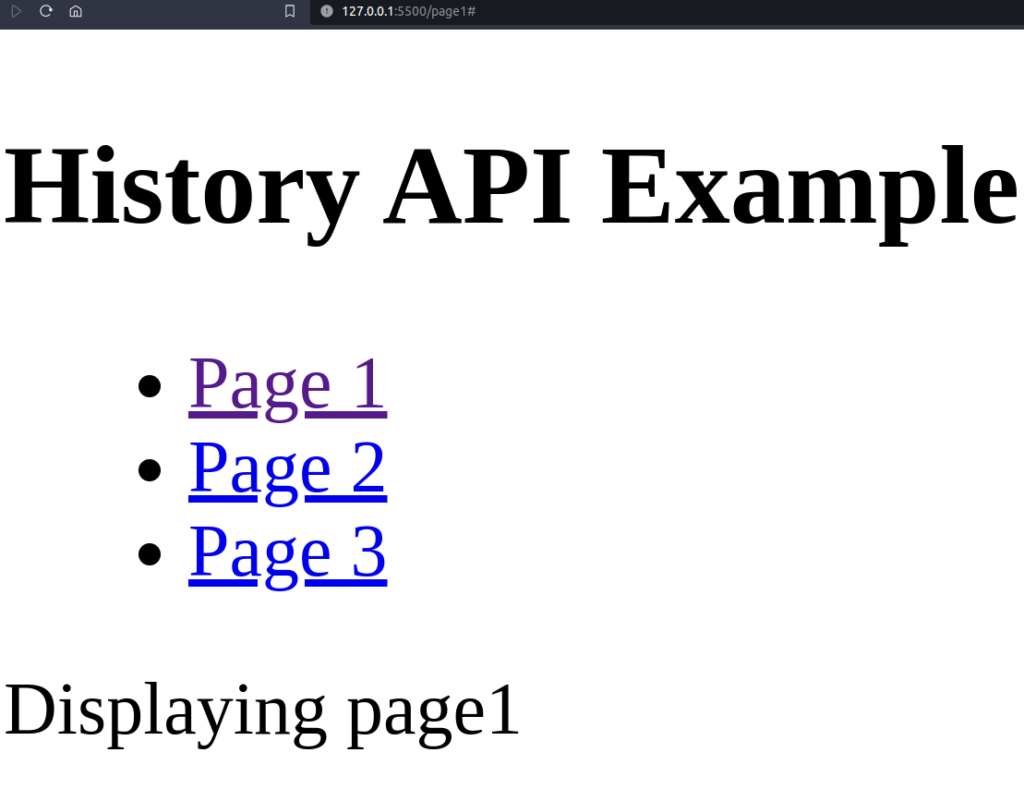
When we click ‘page 1’ the URL changes:

click page 1

Same happens when we click ‘page 3’, the URL changes:

click page 3

Using replaceState() Method:

Similar to pushState(), the replaceState() method enables us to change the URL displayed in the address bar without actually reloading the page. The difference lies in how it treats the browser’s history stack.

Here’s an extension of our previous example to showcase the replaceState() method:

function replaceURL(page) {
  const newURL = `/${page}`;
  history.replaceState(null, null, newURL);
  loadContent(page);
}

While pushState() adds a new entry to the history stack, replaceState() replaces the current entry with the new state. It alters the current URL without creating an additional history entry. This method can be particularly useful in certain scenarios, especially when you want to update the URL without creating a new history item.

In our example, clicking on a link calling replaceURL() would change the URL without adding a new entry to the history stack. This might be preferred in situations where you don’t want users to navigate back to the previous URL but still want to modify the displayed URL.

Let’s explore how the Location API can be used in conjunction with HTML and JavaScript to manipulate URLs without reloading the page.

Using Location API

The Location API in JavaScript provides access to the current URL and allows us to modify it. It includes properties and methods that help us interact with the URL of the current webpage.

Let’s consider a simple HTML structure where a button click changes the URL:

<!DOCTYPE html>
<html>
<head>
  <title>Location API Example</title>
</head>
<body>
  <h2>Location API Example</h2>
  <button onclick="changeURL()">Change URL</button>

  <script>
    function changeURL() {
      const newURL = '/newpage';
      window.history.replaceState(null, null, newURL);
      showCurrentURL();
    }

    function showCurrentURL() {
      // Displaying the current URL
      const currentURL = window.location.href;
      alert(`Current URL: ${currentURL}`);
    }
  </script>
</body>
</html>

This HTML file contains a simple structure with an <h2> heading and a button. When the button is clicked, it triggers the changeURL() function.

Inside the changeURL() function, we use window.history.replaceState() to modify the URL to ‘/newpage’ without triggering a page reload. Additionally, it calls the showCurrentURL() function.

The showCurrentURL() function retrieves the current URL using window.location.href and displays it in an alert for demonstration purposes. In a real application, you might use this information differently, such as updating specific content based on the modified URL.

Here’s the page in action:

Conclusion

In conclusion, JavaScript empowers developers to manipulate URLs effortlessly, enhancing user interactions on web applications. Through the exploration of the History and Location APIs, we’ve uncovered the ability to modify URLs without the page undergoing a complete reload.

Also checkout:

  • How to get the current Year in React
  • Capitalize First letter in JavaScript
  • Remove all Classes from an Element in JavaScript
  • Append Text to a Textarea in JavaScript
  • How to create a style tag using JavaScript
  • Remove all Classes from an Element in JavaScript
  • Hide/Show an Element in JavaScript

Filed Under: javascript Tagged With: beginner, javascript, web developer

How to disable server side rendering in nextjs

December 20, 2023 by Source Freeze Leave a Comment

When working with Next.js, controlling whether your application renders content on the server-side or client-side can significantly impact its performance and behaviour. Server-side rendering (SSR) can sometimes be unnecessary or less suitable for certain projects, and fortunately, Next.js provides ways to disable SSR when needed. In this blog, we’ll learn how to disable server side rendering in Nextjs

how to disable server side rendering in nextjs

Understanding Rendering Methods in Web Development: CSR, SSR, and SSG

In the world of web development, how your web application renders content can significantly impact its performance, SEO, and user experience. Three primary rendering methods—Client-Side Rendering (CSR), Server-Side Rendering (SSR), and Static Site Generation (SSG)—play crucial roles in shaping the behavior and efficiency of modern web applications.

Client-Side Rendering (CSR):

CSR involves loading a web page’s framework and content entirely on the client’s side, typically using JavaScript. When a user requests a page, the server sends a basic HTML file, and then the client-side JavaScript framework takes over, fetching data from APIs and rendering the page content dynamically. This method enhances interactivity but might lead to slower initial loading times, especially on slower devices or networks.

Server-Side Rendering (SSR):

SSR generates the HTML for a web page on the server before sending it to the client. When a user requests a page, the server processes the request, fetches data, and generates an HTML page with populated content. This pre-rendered HTML is then sent to the browser, providing faster initial loading times and better SEO due to the presence of content in the HTML.

Static Site Generation (SSG):

SSG involves generating HTML files during the build time of the application, rather than on each request. This method pre-renders the entire website as static HTML files, which are then served to users. SSG offers the best performance as the content is already available and doesn’t require server processing for each request. However, it might not be suitable for highly dynamic content.

Let’s learn one approach using react-no-ssr todisable server-side rendering in Next.js:

Using react-no-ssr

react-no-ssr is a package that allows components to be excluded from SSR. It ensures that certain parts of your application are only rendered on the client-side, bypassing SSR. Here’s how you can use it:

First, install the react-no-ssr package via npm or yarn:

npm install react-no-ssr
# or
yarn add react-no-ssr

Let’s say you have a component that you want to render only on the client-side. Import the NoSSR component from react-no-ssr:

import dynamic from 'next/dynamic';
import NoSSR from 'react-no-ssr';

const DynamicComponent = dynamic(() => import('../components/YourComponent'), {
  ssr: false,
});

const YourPage = () => {
  return (
    <div>
      {/* Components inside NoSSR will be rendered only on the client-side */}
      <NoSSR>
        <DynamicComponent />
      </NoSSR>

      {/* Other components will follow SSR rules */}
      <YourOtherComponents />
    </div>
  );
};

export default YourPage;

The dynamic function from next/dynamic is used to dynamically load the component. Setting ssr to false ensures it’s excluded from SSR. The DynamicComponent will only be rendered on the client-side, while other components will follow the SSR rules of Next.js.

Using next/dynamic

next/dynamic is a Next.js function that allows for dynamic importing of components. It enables loading components asynchronously, which can be particularly useful when you want to control server-side rendering or optimize the initial loading of a page.

We’ll ensure if we have Next.js installed in our project. next/dynamic is a built-in Next.js feature, so no separate installation is required.

Let’s say you have a component named YourComponent that you want to render only on the client-side:

import dynamic from 'next/dynamic';

const DynamicComponent = dynamic(() => import('../components/YourComponent'), {
  ssr: false, // Set ssr to false to exclude from server-side rendering
});

const YourPage = () => {
  return (
    <div>
      {/* Render the dynamically imported component */}
      <DynamicComponent />
      
      {/* Other components */}
    </div>
  );
};

export default YourPage;

The dynamic function from next/dynamic operates by asynchronously importing components at runtime rather than during the initial server render. When using dynamic, it takes two arguments: a function that imports the component and an options object that can include properties like ssr.

For instance, consider importing a component named YourComponent. By employing dynamic, this import happens on the client-side when the component is required, ensuring that it’s not bundled with the server-rendered HTML. The key here is the ssr: false property within the options object passed to dynamic, explicitly instructing Next.js to exclude this component from server-side rendering. Consequently, when the page loads, YourComponent will be fetched and rendered exclusively on the client-side, optimizing performance by reducing initial load times. This fine-grained control over SSR helps in managing the balance between rendering components on the server for SEO and initial page loads while offloading others for better client-side interactivity.

NextJS has also added an official way to make this work, checkout there official docs on lazy loading here

Using a String (‘use client’)

In Next.js, a specific string at the top of a component file can be used as a workaround to trigger client-side rendering for that component. Here’s how you can do it:

'use client'

import React from 'react';

const YourComponent = () => {
  return (
    <div>
      {/* Your component content */}
    </div>
  );
};

export default YourComponent;

Adding the string 'use client‘ at the top of the component file acts as a signal to Next.js that this component should be rendered on the client-side.This technique exploits Next.js behavior to exclude certain components from server-side rendering.

Note: While this technique works, it’s considered more of a workaround and might not be officially documented or supported. It’s important to test thoroughly and ensure it aligns with the application’s requirements.

Conclusion

In this blog, we’ve explored methods to control how our Next.js apps load. We’ve uncovered next/dynamic, a tool letting us bring in components exactly when needed. Plus, we explored react-no-ssr, a way to say “hey, don’t server-render this one!” And also learnt about the simple but effective “use client” hint, making components show up just on the client-side.

Our other blogs:

  • Capitalize First letter in JavaScript
  • Remove all Classes from an Element in JavaScript
  • Append Text to a Textarea in JavaScript
  • How to create a style tag using JavaScript
  • Remove all Classes from an Element in JavaScript
  • Hide/Show an Element in JavaScript

Filed Under: javascript, NextJS Tagged With: beginner, javascript, nextjs, web developer

How to get a file type from URL in JavaScript

December 20, 2023 by Source Freeze Leave a Comment

JavaScript helps us figure out what type of file from the URL. Knowing how to detect file types programmatically—be it images, documents, or multimedia—is fundamental in various web applications. In this blog, we’ll see how to get a file type from URL in JavaScript.

how to get a file type from URL in JavaScript

Using JavaScript’s split() Function

JavaScript’s split() function proves handy in parsing URLs. We can use this function to isolate the file extension—the part after the last period in a URL—to determine the file type.

Consider this sample code snippet:

function getFileTypeFromURL(url) {
    const segments = url.split('.');
    const extension = segments[segments.length - 1];
    return extension.toLowerCase(); // Convert to lowercase for consistency
}

Example usage:

const url = 'https://example.com/images/image.jpg';
const fileType = getFileTypeFromURL(url);
console.log('File type:', fileType);

This function getFileTypeFromURL() splits the URL based on the periods (.), extracting the file extension from the last segment. This simplistic approach, while effective for most cases, might not cover URLs without extensions or with unconventional naming conventions.

Output:

File type: jpg

Utilizing Regular Expressions

Regular expressions offer a robust way to extract file extensions from URLs, accommodating various naming conventions and handling more complex scenarios.

Consider this updated code:

function getFileTypeWithRegex(url) {
    const regex = /(?:\.([^.]+))?$/; // Regular expression to capture file extension
    const extension = regex.exec(url)[1]; // Extract extension from URL
    return extension ? extension.toLowerCase() : 'No extension found';
}

Example usage:

const url = 'https://example.com/files/document.pdf';
const fileType = getFileTypeWithRegex(url);
console.log('File type:', fileType);

This function getFileTypeFromURL() splits the URL based on the periods (.), extracting the file extension from the last segment. This simplistic approach, while effective for most cases, might not cover URLs without extensions or with unconventional naming conventions.

Output:

File type: pdf

Implementation of split() Technique:

The split() method dissects a string based on a specified separator. In our case, we use the period (.) as the separator to extract the file extension from a URL.

Consider this detailed code example:

function getFileTypeFromURL(url) {
    const segments = url.split('/'); // Split the URL by '/'
    const lastSegment = segments[segments.length - 1]; // Extract the last segment (file name)
    const fileParts = lastSegment.split('.'); // Split the file name by '.'

    if (fileParts.length === 1) {
        return 'No file extension found';
    } else {
        const extension = fileParts[fileParts.length - 1]; // Retrieve the extension
        return extension.toLowerCase(); // Return the extension in lowercase for consistency
    }
}

// Example usage:
const imageURL = 'https://example.com/images/image.jpg';
const documentURL = 'https://example.com/files/document.pdf';

const imageFileType = getFileTypeFromURL(imageURL);
const documentFileType = getFileTypeFromURL(documentURL);

console.log('Image file type:', imageFileType);
console.log('Document file type:', documentFileType);

This getFileTypeFromURL() function splits the URL into segments, retrieves the last segment (presumed to be the file name), and further splits the file name to extract the file extension. It then returns the extracted extension in lowercase, providing insight into the file type.

Here’s the output:

getFileTypeFromURL() output

Conclusion:

JavaScript makes it easy to know what type of file we’re dealing with, just by checking its web address. With these methods, handling different files becomes simpler for websites and apps.

Also checkout:

  • How to Concatenate Two Numbers in JavaScript
  • Capitalize First letter in JavaScript
  • Remove all Classes from an Element in JavaScript
  • Append Text to a Textarea in JavaScript
  • How to create a style tag using JavaScript
  • Remove all Classes from an Element in JavaScript

Filed Under: javascript Tagged With: beginner, javascript, web developer

How to press the Enter key programmatically in JavaScript

December 20, 2023 by Source Freeze Leave a Comment

JavaScript enables us to perform various actions on a webpage, and simulating the pressing of the Enter key is one of them. Whether it’s for form submissions or triggering specific functionalities, understanding how to programmatically press Enter can streamline user interactions. In this guide, we’ll explore how to press the Enter key programmatically in JavaScript:

How to press the Enter key programmatically in JavaScript

Simulate Enter key presses

To simulate pressing the Enter key programmatically in JavaScript, we can use the dispatchEvent method along with creating a KeyboardEvent. Here’s a simple example using HTML and JavaScript:

<!DOCTYPE html>
<html>
<head>
  <title>Press Enter Key Demo</title>
</head>
<body>
  <input type="text" id="textInput" placeholder="Press Enter!">
  <button onclick="simulateEnter()">Simulate Enter</button>

  <script>
    function simulateEnter() {
      // Retrieve the input element
      const inputField = document.getElementById('textInput');

      // Create a new keyboard event for 'Enter' key
      const enterEvent = new KeyboardEvent('keydown', {
        key: 'Enter',
        code: 'Enter',
        keyCode: 13,
        which: 13,
      });

      // Dispatch the 'Enter' event on the input element
      inputField.dispatchEvent(enterEvent);
    }
  </script>
</body>
</html>

This HTML snippet includes an input field and a button. Upon clicking the button, the simulateEnter JavaScript function triggers a simulated Enter key press by creating a new KeyboardEvent object. The event is dispatched on the input field, mimicking an actual Enter key press.

Event Listener on Input Field

We can listen for the Enter key press directly on an input field and execute a function when the Enter key is pressed by doing this:

<input type="text" id="textInput" placeholder="Press Enter" onkeydown="handleEnter(event)">
<script>
  function handleEnter(event) {
    if (event.key === 'Enter') {
      // Perform desired action upon Enter key press
      // For example: YourFunctionName();
    }
  }
</script>

By attaching the onkeydown attribute to the input field, the handleEnter function checks if the pressed key is ‘Enter’ and executes a specified function.

Using JavaScript’s addEventListener

Utilizing JavaScript’s addEventListener allows us to listen for the Enter key press more dynamically:

<input type="text" id="textInput" placeholder="Press Enter!">
<button id="enterButton">Simulate Enter</button>

<script>
  const inputField = document.getElementById('textInput');
  const enterButton = document.getElementById('enterButton');

  enterButton.addEventListener('click', simulateEnter);

  function simulateEnter() {
    // Create a new keyboard event for 'Enter' key
    const enterEvent = new KeyboardEvent('keydown', {
      key: 'Enter',
      code: 'Enter',
      keyCode: 13,
      which: 13,
    });

    // Dispatch the 'Enter' event on the input element
    inputField.dispatchEvent(enterEvent);
  }
</script>

Binding Enter Key to Button Click

<input type="text" id="textInput" placeholder="Press Enter to click the button">
<button id="submitButton">Submit</button>

<script>
  const inputField = document.getElementById('textInput');
  const submitButton = document.getElementById('submitButton');

  inputField.addEventListener('keydown', function(event) {
    if (event.key === 'Enter') {
      // Simulate button click on Enter key press
      submitButton.click();
    }
  });

  submitButton.addEventListener('click', function() {
    // Your function to execute on button click
    // For example: submitForm();
    console.log('Button Clicked!');
  });
</script>

In this example, when the Enter key is pressed inside the input field, it triggers a simulated click event on the submit button. After which the function associated with the button click event, submitForm() in this case, gets executed.

Here’s how the output in the console will look like upon clicking 3 times:

Conclusion

In this blog, we’ve explored various methods to simulate the pressing of the Enter key programmatically in JavaScript. By leveraging simple yet powerful techniques, we’ve learned how to trigger actions, validate forms, and enhance user interactions seamlessly.

Through practical examples and straightforward explanations, we’ve discovered how to:

  • Simulate Enter key presses.
  • Dynamically execute functions upon Enter key events.
  • Bind Enter key functionality to trigger button clicks.

Also, check out:

  • Capitalize First letter in JavaScript
  • Remove all Classes from an Element in JavaScript
  • Append Text to a Textarea in JavaScript
  • How to create a style tag using JavaScript
  • Remove all Classes from an Element in JavaScript
  • Hide/Show an Element in JavaScript

Filed Under: javascript Tagged With: beginner, javascript, web developer

How to detect when the user stops typing in JavaScript

December 20, 2023 by Source Freeze Leave a Comment

In the world of JavaScript, tracking user actions is crucial. Understanding when a user stops typing can enhance user experience, enabling applications to respond effectively. When we talk about detecting typing pauses, we’re essentially interested in capturing the moment when the user finishes entering text. There are several methods to detect when the user stops typing in JavaScript:

How to detect when the user stops typing in JavaScript

The first method to detect when a user stops typing in JavaScript involves using the input event and a timer. This technique monitors the input field and triggers an action when the user pauses typing.

Using input Event and Timer

This technique involves leveraging the input event, which is fired whenever the value of an input field changes. When a user types in an input field, this event continuously triggers, indicating ongoing activity. However, to pinpoint when the user stops typing, we incorporate a timer mechanism.

const inputField = document.getElementById('yourInputField');
let typingTimer;

inputField.addEventListener('input', function() {
    // Clear previous timeout to avoid premature triggers
    clearTimeout(typingTimer);
    
    // Set a new timeout of 800 milliseconds (adjustable)
    typingTimer = setTimeout(function() {
        // Perform action after typing pause
        actionAfterTypingPause();
    }, 800); // Adjust time duration as needed
});

Here’s how it works: Upon detecting the input event, we initialize a timer. If the user continues typing, this timer keeps getting reset, preventing premature triggers. However, when the user pauses typing, the timer finally elapses after a specified duration (here, set at 800 milliseconds). It’s at this point that we consider the typing paused and execute the intended action.

Using Event Debouncing

Debouncing involves optimizing event handling by delaying the execution of a function until after a certain time period has passed since the last fired event. This method helps in handling rapid, successive events and detecting pauses effectively.

Debounce Function: We’ll create a debounce function that delays the execution of a function until a specified time has elapsed since the last event. Here’s a simple implementation:

function debounce(func, delay) {
    let timeoutId;
    return function() {
        clearTimeout(timeoutId);
        timeoutId = setTimeout(func, delay);
    };
}

Implementing the Debounce Function: Now, let’s apply this debounce function to our input field event listener:

const inputField = document.getElementById('yourInputField');

inputField.addEventListener('input', debounce(function() {
    // Perform action after typing pause
    actionAfterTypingPause();
}, 800)); // Set the delay duration as needed (800 milliseconds in this case)

Action on Typing Pause: Replace actionAfterTypingPause() with the function or action you wish to execute when the typing pause occurs. This could include form validation, sending HTTP requests, or updating suggestions.

Here’s how it works: The debounce function we create acts as a wrapper around the actual function we want to execute. When the input event fires (i.e., when the user types), this function postpones the execution of our target action until a specified time (here, set at 800 milliseconds) has passed since the last input event.

This delay gives users a chance to finish typing before any action takes place. If another input event occurs within this time frame, the previous timer gets cleared, effectively resetting the countdown. Only when the user pauses typing for the entire specified duration does the action finally execute.

Utilizing the keyup Event Listener

Attach the keyup Event Listener: We’ll add an keyup event listener to the input field, capturing each key release action.

const inputField = document.getElementById('yourInputField');

inputField.addEventListener('keyup', function() {
    // Perform action after typing pause
    actionAfterTypingPause();
});

Perform Action on Typing Pause: Similar to previous methods, replace actionAfterTypingPause() with the function or action you intend to execute when the typing pause occurs. This action could involve validation checks, auto-completion suggestions, or any relevant updates based on user input.

Observing Key Releases: The keyup event fires each time a key is released within the input field. By listening to these events, we can effectively track the user’s typing activity and identify pauses between keystrokes.

Here’s an HTML example incorporating an input field and the JavaScript code utilizing the keyup event listener to detect typing pauses:

<!DOCTYPE html>
<html lang="en">
<head>
  <meta charset="UTF-8">
  <title>Typing Pause Detection</title>
</head>
<body>
  <input type="text" id="textInput" placeholder="Start typing...">
  
  <script>
    // JavaScript code
    const inputField = document.getElementById('textInput');

    inputField.addEventListener('keyup', function() {
        // Replace this with your intended action after typing pause
        // For demonstration purposes, log a message
        console.log('Detected typing pause!');
        // You can call a function or execute specific actions here
    });
  </script>
</body>
</html>

This HTML file includes a simple input field (<input type="text">) with an ID of “textInput” where users can input text. The JavaScript code snippet within the <script> tags listens for keyup events on this input field.

Upon detecting a keyup event (when a key is released after being pressed), the code executes the specified action. In this example, a message is logged to the console to indicate a detected typing pause. You can replace the console.log statement with any desired action or function to be performed when the user pauses typing. As you type in the input field and release keys, the console should log the message

Detected typing pause!

Conclusion:

In this blog, we explored various methods to detect typing pauses in JavaScript. We delved into three distinct techniques:

  1. Using the input Event and Timer: This method involves setting up an input event listener combined with a timer to execute actions after a typing pause.
  2. Utilizing Event Debouncing: Debouncing optimizes event handling by delaying function execution until a specified time has passed since the last fired event, effectively detecting typing pauses.
  3. Leveraging the keyup Event Listener: By attaching a keyup event listener to an input field, we monitored key releases to identify typing pauses.

Our other blogs:

  • Capitalize First letter in JavaScript
  • Remove all Classes from an Element in JavaScript
  • Append Text to a Textarea in JavaScript
  • How to create a style tag using JavaScript
  • Remove all Classes from an Element in JavaScript
  • Hide/Show an Element in JavaScript

Filed Under: javascript Tagged With: beginner, javascript, web developer

How do you get the current url in Nextjs?

December 15, 2023 by Source Freeze Leave a Comment

In this blog, we will explore the topic of retrieving the current URL in Next.js, a powerful React framework. Understanding how to obtain the current URL is crucial for various web development scenarios. We’ll explore the steps to achieve this and provide real life code examples to get the current url in Nextjs.

How do you get the current url in Nextjs?

Getting Started:

To kick things off, let’s understand why obtaining the current URL is important in web development. Often, we encounter situations where we need to dynamically update content based on the URL or perform specific actions. In Next.js, achieving this is straightforward, and we will guide you through the process.

Using useRouter Hook for Client-Side Access

The useRouter hook is a cornerstone for client-side URL access in Next.js. Import it using import { useRouter } from 'next/router' to utilize its functionalities within your components.

import { useRouter } from 'next/router'

function YourComponent() {
  const { asPath, pathname } = useRouter();

  // Your component logic

  return <h2>Your Component</h2>
}

Here, asPath holds the full page path, while pathname encapsulates the page’s specific path, even with dynamic routing parameters.

The useRouter hook serves as a fundamental tool for accessing URL details on the client side within Next.js components.

Breakdown:

  • asPath: Represents the complete URL path, including query parameters and hash fragments. It’s valuable for capturing the entire route a user is visiting.
  • pathname: Indicates the specific page path, even with dynamic routing parameters. This property is useful for targeting specific routes within your application.

Practical Use:

  • Dynamic Page Rendering: Determine the specific route or page being accessed by extracting data from asPath or pathname.
  • Conditional Rendering: Implement conditional logic based on the current URL path or query parameters using these properties.

Unveiling URL Details on the Server

In scenarios requiring Server-Side Rendering (SSR) through getServerSideProps, accessing URL information involves different approaches. Leveraging req.url or query within the getServerSideProps the function offers insights into the URL structure. Moreover, the resolvedUrl property provides the URL without the _next/data prefix, vital for client transitions.

export async function getServerSideProps({ req, query, resolvedUrl }) {
  console.log(req, query, resolvedUrl)
  return { props: {} }
}

Breakdown:

  • req.url: Provides the path, similar to the asPath on the client side.
  • query: Contains query strings and path parameters.
  • resolvedUrl: Offers the URL without the _next/data prefix, enabling smoother client transitions.

Practical Use:

  • Server-Side Data Fetching: Fetch data based on the URL parameters or path accessed during server-side rendering.
  • URL Transformation: Manipulate the URL for specific server-side functionalities or API interactions based on the accessed route.

Static Site Generation and URL Retrieval

For Static Site Generation (SSG) via getStaticProps, the params object holds the defined parameters from the path. This method grants access to crucial parameters, allowing precise handling of page generation.

export async function getStaticProps({ params }) {
  console.log(params)
  return { props: {} }
}

Breakdown:

  • params: Holds parameters defined in the URL path, aiding in precise page generation.

Practical Use:

  • Dynamic Page Generation: Generate static pages based on URL parameters, ensuring dynamic content for specific routes.
  • Custom Page Rendering: Craft pages with dynamic content fetched based on URL parameters for a personalized user experience.

Conclusion

In this blog, we delved into comprehensive methods of obtaining the current URL in Next.js, covering:

  1. Using useRouter Hook for Client-Side Access
  2. Unveiling URL Details on the Server
  3. Static Site Generation and URL Retrieval

Understanding these distinct methods for obtaining URLs in Next.js empowers developers to employ diverse strategies for client-side interactivity, server-side data retrieval, and dynamic page generation.

Our other blogs:

  • Capitalize First letter in JavaScript
  • Remove all Classes from an Element in JavaScript
  • Append Text to a Textarea in JavaScript
  • How to create a style tag using JavaScript
  • Remove all Classes from an Element in JavaScript
  • Hide/Show an Element in JavaScript

Filed Under: NextJS Tagged With: beginner, javascript, nextjs, web developer

How to Concatenate Two Numbers in JavaScript

December 15, 2023 by Source Freeze Leave a Comment

JavaScript, as a versatile language, offers various methods to manipulate and combine numbers effortlessly. When it comes to concatenating or merging two numbers together, understanding the right approach can make a significant difference. In this guide, we’ll learn how to concatenate two Numbers in JavaScript

How to Concatenate Two Numbers in JavaScript

Using String Conversion for Concatenation

One of the most straightforward ways to concatenate numbers in JavaScript involves converting them to strings and then merging these strings. Here’s a practical example:.

let num1 = 23;
let num2 = 5;
let concatenated = num1.toString() + num2.toString();
console.log(concatenated); 

Output:

"235"

Conversion using ‘+’

When you use the `+` operator between strings and numbers, it implicitly convert the numbers into strings before concatenation:

let a = 30;
let b = 70;
let result = "The sum is: " + a + b;
console.log(result);

In this scenario, JavaScript automatically converts a and b into strings before appending them to the string “The sum is: “. The final output becomes:

The sum is: 3070

Template Literals for Concatenation

Template literals offer a modern and concise approach to concatenating numbers within strings. They provide a more readable and flexible way to embed variables into strings.

Consider this example:

let x = 15;
let y = 35;
let message = `The concatenated result is: ${x}${y}`;
console.log(message);

Here, ${x} and ${y} within the backticks are placeholders for the variables x and y. These placeholders directly embed the values of x and y into the resulting string, creating the output as:

The concatenated result is: 1535

Template literals help when you need to create complex strings with embedded variables or expressions. They are especially handy for generating dynamic strings in functions, error messages, or any context where string interpolation is beneficial.

Array Join Method for Number Concatenation

JavaScript’s Array.join() method provides an alternative way to concatenate numbers by leveraging arrays.

Consider the following example:

let numberArray = [1, 2, 3];
let concatenatedString = numberArray.join('');
console.log(concatenatedString); 

In this example, numberArray contains three numerical values: 1, 2, and 3. The join('') method concatenates these numbers by converting them into strings and joining them together with an empty string as the separator. The resulting string is:

123

Conclusion:

In this blog, we explored various methods for concatenating numbers in JavaScript. We learned about:

  1. Using toString() for straightforward conversions,
  2. Conversion using ‘+’,
  3. Leveraging template literals for readable embedding, and
  4. Applying Array.join() to concatenate arrays efficiently.

Also checkout:

  • Capitalize First letter in JavaScript
  • Remove all Classes from an Element in JavaScript
  • Append Text to a Textarea in JavaScript
  • How to create a style tag using JavaScript
  • Remove all Classes from an Element in JavaScript

Filed Under: javascript Tagged With: beginner, javascript, web developer

How to compare date with current date in javascript

December 15, 2023 by Source Freeze Leave a Comment

In JavaScript, comparing dates is crucial for various applications. Whether it’s for scheduling, validation, or conditional operations, understanding how to compare dates with the current date is fundamental. We’ll explore several methods to compare date with current date in JavaScript.

How to compare date with current date in javascript

Using the Date Object

The Date object in JavaScript is pivotal for working with dates. By creating instances of Date, we can perform comparisons easily.

// Create a date object for the current date
const currentDate = new Date();

// Create another date object for comparison
const otherDate = new Date('2025-09-03');

// Compare the two dates
if (currentDate > otherDate) {
  console.log('The current date is after the specified date.');
} else if (currentDate < otherDate) {
  console.log('The current date is before the specified date.');
} else {
  console.log('Both dates are equal.');
}

This code snippet utilizes JavaScript’s Date object to create two instances: currentDate, representing the current date and time, and otherDate, set to September 3, 2025. It employs conditional statements to compare these dates. If currentDate is later than otherDate, it will log “The current date is after the specified date.” Conversely, if currentDate is earlier than otherDate, it logs “The current date is before the specified date.” In the scenario where both dates are identical, the output will be “Both dates are equal.” Here we get:

The current date is before the specified date.

Using getTime() Method

Another approach involves utilizing the getTime() method, which returns the number of milliseconds since January 1, 1970. This enables direct numerical comparisons between dates.

// Create a date object for the current date
const currentDate = new Date();

// Create another date object for comparison
const otherDate = new Date('2025-09-03');

// Get milliseconds for current date
const currentTime = currentDate.getTime();

// Get milliseconds for another date
const otherTime = otherDate.getTime();

// Compare the milliseconds
if (currentTime > otherTime) {
  console.log('The current date is after the specified date.');
} else if (currentTime < otherTime) {
  console.log('The current date is before the specified date.');
} else {
  console.log('Both dates are equal.');
}

This code snippet starts by creating two Date objects: currentDate, representing the current date and time, and otherDate, set to September 3, 2025. Additionally, it calculates the number of milliseconds since January 1, 1970, for both currentDate and otherDate using the getTime() method, storing these values in currentTime and otherTime, respectively.

The subsequent conditional statements compare these calculated millisecond values. If currentTime exceeds otherTime, it logs “The current date is after the specified date.” Conversely, if currentTime is less than otherTime, it outputs “The current date is before the specified date.” In the event where both millisecond values are identical, it logs “Both dates are equal.”

We’ll get the same output as before:

The current date is before the specified date.

Conclusion:

In this blog, we explored two primary methods for comparing dates in JavaScript. The first method involved direct Date object comparison, employing standard operators to evaluate the relationship between dates. The second method utilized milliseconds obtained through the getTime() method, allowing for a numerical comparison between the dates’ underlying values.

Also check out:

  • Capitalize First letter in JavaScript
  • Remove all Classes from an Element in JavaScript
  • Append Text to a Textarea in JavaScript
  • How to create a style tag using JavaScript
  • Remove all Classes from an Element in JavaScript
  • Hide/Show an Element in JavaScript

Filed Under: javascript Tagged With: beginner, javascript, web developer

Split a String on Capital Letters using JavaScript

December 15, 2023 by Source Freeze Leave a Comment

In JavaScript, string manipulation stands as a fundamental skill, empowering developers to use the language’s capabilities effectively. Throughout this comprehensive guide, we’ll explore this process, dissecting JavaScript code snippets and learning their functionality to split a string on Capital Letters using JavaScript.

Split a String on Capital Letters using JavaScript

First, let’s discuss the methodology behind this operation.

Understanding the split() Method in JavaScript

The split() method, used for string manipulation in JavaScript, allows us to divide a string into an array of substrings based on a specified separator.

Consider a string with a sequence of words in camelCase or PascalCase, where each word begins with a capital letter. Utilizing the split() method in conjunction with a regular expression tailored to identify capital letters, we can effectively segment the string at these points, extracting meaningful components.

Let’s illustrate this process with a code snippet:

const text = "SplittingStringsOnCapitalLetters";
const result = text.split(/(?=[A-Z])/);
console.log(result);

In this example, the split() method employs a regular expression (?=[A-Z]). Indicating that the split should occur before any capital letter. Running this code would generate an array containing individual words derived from the initial string, separated at the capital letters:

Output

["Splitting", "Strings", "On", "Capital", "Letters"]

When working with strings that contain blank spaces or whitespace characters, managing these elements becomes crucial. JavaScript provides the trim() method, which proves invaluable in handling leading and trailing whitespace within strings.

Handling Strings Starting with Whitespace

Identifying the Issue

Consider a scenario where the input string begins with whitespace:

const textWithSpace = "  StartingWithSpaceSplitOnCaps";
const resultWithoutTrim = textWithSpace.split(/(?=[A-Z])/);
console.log(resultWithoutTrim);

When attempting to split this string based on capital letters without applying trim(), the outcome might not align with our expectations due to the leading whitespace. The resulting array might contain an additional empty string or a segment not correctly formed:

["", "Starting", "With", "Space", "Split", "On", "Caps"]

The initial empty string in the resulting array emerges from the leading whitespace, leading to an undesired element in the segmented array.

Managing Whitespace with trim() Method

The trim() method, an essential tool in string manipulation, facilitates the removal of whitespace characters from both ends of a string. These whitespace characters include spaces, tabs, and newline characters, among others.

Let’s incorporate trim() into our previous code snippet to handle potential whitespace around the string before splitting it based on capital letters:

const textWithSpace = "  StartingWithSpaceSplitOnCaps";
const trimmedText = textWithSpace.trim();
const resultWithTrim = trimmedText.split(/(?=[A-Z])/);
console.log(resultWithTrim);

Applying trim() to textWithSpace eliminates the leading whitespace before executing the split() operation based on capital letters. Consequently, the resulting array reflects the segmented words accurately:

["Starting", "With", "Space", "Split", "On", "Caps"]

By incorporating trim() before splitting the string, we ensure that leading whitespace doesn’t interfere with the intended segmentation based on capital letters.

Conclusion:

There you go! Now you’ve got a good handle on handling words in JavaScript! We’ve seen how split() helps with word division and how trim() tidies up spaces. With these simple tricks, working with words becomes much easier in JavaScript.

Also checkout:

  • Capitalize First letter in JavaScript
  • Remove all Classes from an Element in JavaScript
  • Append Text to a Textarea in JavaScript
  • How to create a style tag using JavaScript
  • Remove all Classes from an Element in JavaScript
  • Hide/Show an Element in JavaScript

Filed Under: javascript Tagged With: beginner, javascript, web developer

Next Page »

Recent Posts

  • How to Generate random numbers in JavaScript
  • How to Scroll to an Element in a React Component?
  • How to get a Date without the Time in JavaScript
  • How to modify url without reloading the page using javascript
  • How to disable server side rendering in nextjs
  • How to get a file type from URL in JavaScript

Recent Comments

    Tags

    beginner colon cross-platform es6 function html ionic iOS javascript mobile application development nextjs objective-c swift switch ternary typescript uiwebview Visual Studio plugin web developer

    Copyright © 2025 Source Freeze