In the previous example we have learned how to create UIActivityIndicator Example in swift, this tutorial we will learn about how to create MBProgressHUD Example in swift.
What is MBProgressHUD?
MBProgressHUD is an custom control that is used to displays a translucent HUD with a progress indicator with some optional labels while work is being done in a background thread.
Comparing to default UIActivityIndicator, MBProgressHUD is a very stable, flexible and very nice user interface implementation of an activity indicator with lot customization options and often many of us prefer to use this rather than default UIActivityIndicatorView.
it works on iOS 6+ and requires ARC to build.
Getting Started
Open the Xcode and create a new single view application,
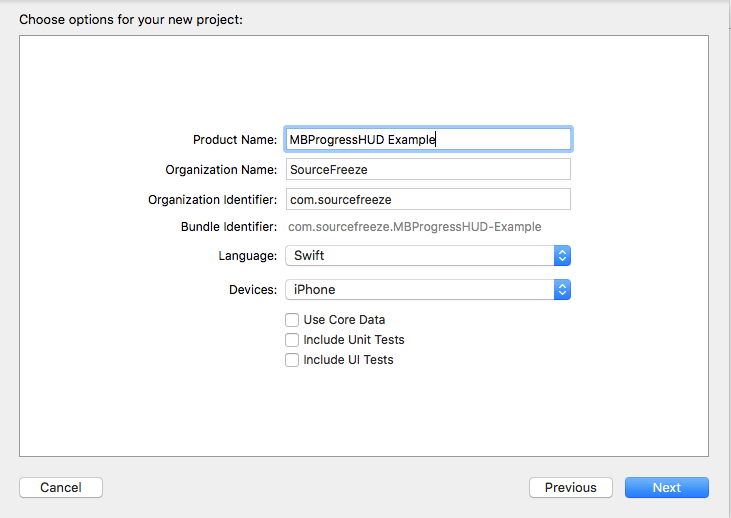
Then, enter the product name as “MBProgressHUD Example” next fill out the Organization Name and Organization identifier then select “Swift” language and device family as iPhone and remains core data field as unchecked because we are not using that feature.
Next, we need to configure our project with MBProgressHUD by referring it’s library files. this files are currently available in Objective-C, but still we can use that MBProgressHUD in swift project by following the below steps.
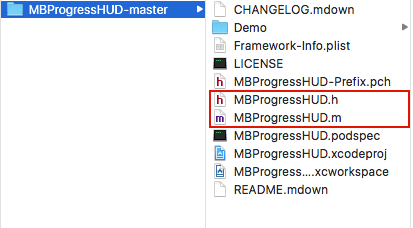
Download the MBPrgoressHUD Files using this link and extract the downloaded files, just drag and drop the below selected source files into the project.
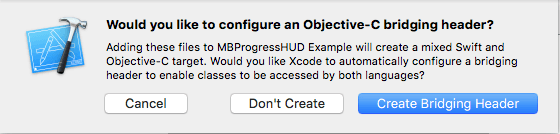
While adding that project one prompt will open with the title of “Would like to configure an Objective-C bridging header?” please select “Create Bridging Header” button, it will create bridging header file to use objective-c files in swift project.
Open that created {productname}-bridging-header.h file and import MBProgressHUD.h file by adding the below code into bridging-header.h file,
#import "MBProgressHUD.h"
yes, the configuration part is over, now our project is ready to use with HUD library.
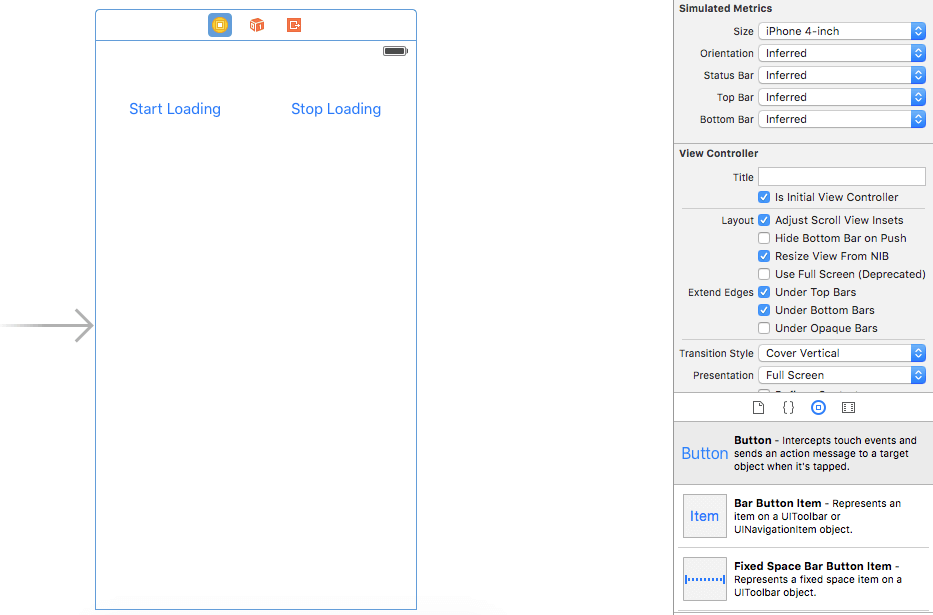
Open the Main.storyboard and select ViewController size as preferred iPhone size using Simulated Metrics option in the right side, then add two button from object library name it as “Start Loading” and “Stop Loading” as shown in the below image.
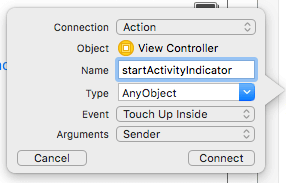
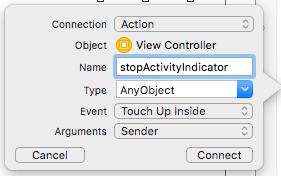
Next have to create an IBAction for this two buttons by clicking show assistant editor.
Create startActivityIndicator function by adding IBAction for StartLoading Button,
Create stopActivityIndicator function by adding IBAction for StopLoading Button,
Then add the below code snippet in the startActivityIndicator method,
  @IBAction func startActivityIndicator(sender: AnyObject)
  {
  let spinnerActivity = MBProgressHUD.showHUDAddedTo(self.view, animated: true);
  spinnerActivity.label.text = "Loading";
  spinnerActivity.detailsLabel.text = "Please Wait!!";
  spinnerActivity.userInteractionEnabled = false;
  }
Here we are creating object for activity indicator, then adding values for label, detailsLabel. As well user can add other properties like color, background, setTimeOut etc..
Note:
We have set userInteractionEnabled Property as false it is allow to access other action while activity indicator is loading.
Next add the below code snippet in stopActivityIndicator function.
@IBAction func stopActivityIndicator(sender: AnyObject)
{
  MBProgressHUD.hideAllHUDsForView(self.view, animated: true);
}
Instead of this function we can also hide the MBProgressHUD by an already created reference object.
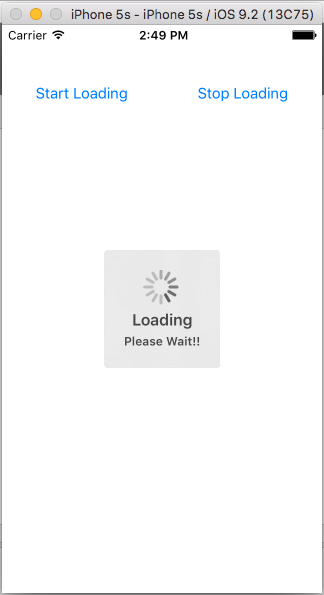
Then Build and Run the project will get the below output:
Closing MBProgressHUD after specific action is completed:
MBProgressHUD is mainly used to show the specific action is occurs and once completed action we need to close after some set of actions is completed. For this scenario, we can use the below direct method to close automatically after specific actions are completed.
Please refer to the below code snippet for this.
let spinnerActivity = MBProgressHUD.showHUDAddedTo(self.view, animated: true); spinnerActivity.label.text = "Loading"; spinnerActivity.detailsLabel.text = "Please Wait!!"; spinnerActivity.userInteractionEnabled = false;dispatch_async(dispatch_get_global_queue(DISPATCH_QUEUE_PRIORITY_LOW, 0)) { // Add some background task like image download, website loading. dispatch_async(dispatch_get_main_queue()) { spinnerActivity.hideAnimated(true); } }
Leave a Reply