Ionic framework provides excellent side menu directive which is easy to implement and also having the excellent user interface, in this example we will learn about how to create a simple ionic side menu example. This ionic side menu also known as ionic navigation drawer and many of us know it is one of the best and popular navigation pattern for mobile applications.
Related Post: getting started with ionic framework
ionic side menu directive
The ion-side-menus it is the parent container of ionic side menu and it contains ion-side-menu-content and ion-side-menu.
ion-side-menu-content : it is used to show the main content.
ion-side-menu : it is used show right and left side menu content. we can can specify using side=”left” or side=”right” property like mentioned in the below code.
<ion-side-menus>
<!-- Main content -->
<ion-side-menu-content>

</ion-side-menu-content>

<!-- Left Side Menu -->
<ion-side-menu side="left">

</ion-side-menu>

<!-- Right Side Menu -->
<ion-side-menu side="right">

</ion-side-menu>
</ion-side-menus>
expose-aside-when
expose-aside-when used to hide a menu when in portrait mode, but to show the same menu on the left side when the tablet is in landscape mode.
The possible values for expose-aside-when attribute are a media query specifying min-width or the keyword large which is a shortcut for (min-width:768px). The above example if 768px or greater will show the sidemenu next to the content whereas if the width is less than 768px, it will act as a normal slide-out side menu.
menu-toggle
the menu toggle button will only appear on a root level side-menu page, you can hide the menu toggle button in the child view by using enable-menu-with-back-views=”true” property.
menu-close
menu-close is an attribute directive that closes a currently opened side menu.
ionic side menu getting started
Lets start the ionic side menu tutorial by using ionic command line interface, it provides ionic side menu template so we can directly create the ionic side menu application using the below command.
ionic start ionic-sidemenu-example sidemenu
Once the project is created, you can find the index.html in the root of www folder and browse, login, menu, playlist, playlists, search html files in the template folder.
The ionic side menu project is made up of the main.html and index.html page, a menu.html template which serves as our template and contains our side menu code. let’s see the index.html code.
<!DOCTYPE html>
<html>
<head>
<meta charset="utf-8">
<meta name="viewport" content="initial-scale=1, maximum-scale=1, user-scalable=no, width=device-width">
<title></title>

<link href="lib/ionic/css/ionic.css" rel="stylesheet">
<link href="css/style.css" rel="stylesheet">

<!-- IF using Sass (run gulp sass first), then uncomment below and remove the CSS includes above
<link href="css/ionic.app.css" rel="stylesheet">
-->

<!-- ionic/angularjs js -->
<script src="lib/ionic/js/ionic.bundle.js"></script>

<!-- cordova script (this will be a 404 during development) -->
<script src="cordova.js"></script>

<!-- your app's js -->
<script src="js/app.js"></script>
<script src="js/controllers.js"></script>
</head>

<body ng-app="starter">
<ion-nav-view></ion-nav-view>
</body>
</html>
now open the menu.html application it is already having the left side content.
<ion-side-menus enable-menu-with-back-views="false">
<ion-side-menu-content>
<ion-nav-bar class="bar-stable">
<ion-nav-back-button>
</ion-nav-back-button>

<ion-nav-buttons side="left">
<button class="button button-icon button-clear ion-navicon" menu-toggle="left">
</button>
</ion-nav-buttons>
</ion-nav-bar>
<ion-nav-view name="menuContent"></ion-nav-view>
</ion-side-menu-content>

<ion-side-menu side="left">
<ion-header-bar class="bar-stable">
<h1 class="title">Left</h1>
</ion-header-bar>
<ion-content>
<ion-list>
<ion-item menu-close ng-click="login()">
Login
</ion-item>
<ion-item menu-close href="#/app/search">
Search
</ion-item>
<ion-item menu-close href="#/app/browse">
Browse
</ion-item>
<ion-item menu-close href="#/app/playlists">
Playlists
</ion-item>
</ion-list>
</ion-content>
</ion-side-menu>
</ion-side-menus>
the application configuration part is done using app.js file, that uses concept of angular-ui routing
.config(function($stateProvider, $urlRouterProvider) {
$stateProvider

.state('app', {
url: '/app',
abstract: true,
templateUrl: 'templates/menu.html',
controller: 'AppCtrl'
})

.state('app.search', {
url: '/search',
views: {
'menuContent': {
templateUrl: 'templates/search.html'
}
}
})

.state('app.browse', {
url: '/browse',
views: {
'menuContent': {
templateUrl: 'templates/browse.html'
}
}
})
.state('app.playlists', {
url: '/playlists',
views: {
'menuContent': {
templateUrl: 'templates/playlists.html',
controller: 'PlaylistsCtrl'
}}})

.state('app.single', {
url: '/playlists/:playlistId',
views: {
'menuContent': {
templateUrl: 'templates/playlist.html',
controller: 'PlaylistCtrl'
}
}
});
// if none of the above states are matched, use this as the fallback
$urlRouterProvider.otherwise('/app/playlists');
});
in the previous we have mentioned to load the menucontent in the ion-nav-view, so it loads menuContent view which means templates playlists content as per our configuration in app.js file.
<ion-nav-view name="menuContent" animation="slide-left-right"></ion-nav-view>
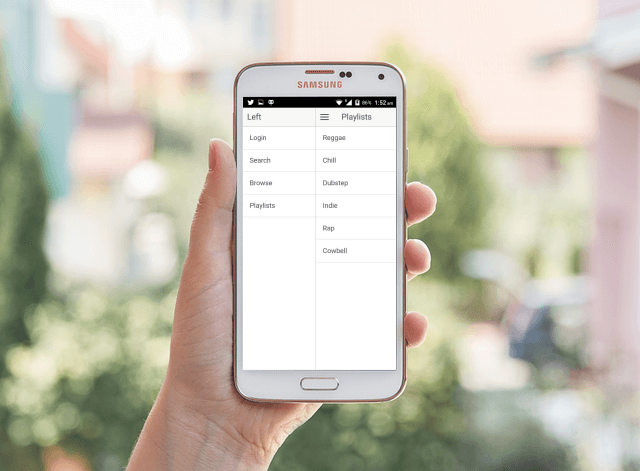
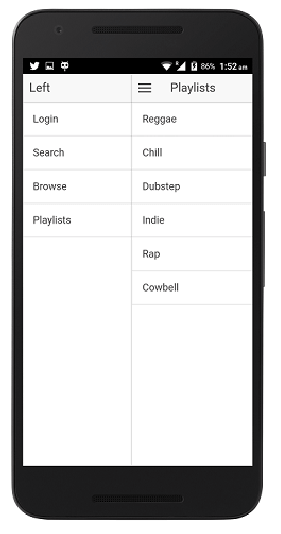
then build and run the application it will work on iOS, Android and windows phone. For testing purpose you can use browsers. The output will looks like below.


Leave a Reply